Pages

Wednesday, July 31, 2013

DIY Mercury Glass

Today we are going to turn a plain old glass vase into beautiful faux mercury glass:


This project is super easy and can be done in about an hour.   Here's what you'll need:


1. Looking Glass Paint (this is different than reflective silver paint.)
2. Vinegar
3. A clear glass vase (this one was from good will and cost 99 cents!)
4. A spray bottle
5. A lint-free rag.

Begin by mixing one cup of vinegar with one cup of water in the spray bottle.  Spray the entire vase with the mixture.  It's best to use a heavier spray rather than a fine mist so that the droplets are larger.  While the vase is still wet spray one coat of the looking glass paint over the entire surface. (Remember to shake well before spraying!) Let it sit for 5 minutes.


After the paint has partially dried wipe down the vase with the rag, using light pressure on some spots and heavy pressure on others.


Repeat this process for a total of 3-4 coats on the outside of the vase.  Then repeat the process with 3-4 coats on the inside of the vase.  The reason for painting both sides is that the mirror paint dries with a dull silver on one side and a reflective finish on the other.  By incorporating both elements you give your vase the multi-dimensional look of real mercury glass.


Voila!


Thursday, July 25, 2013

Thursday Tips- Get Rid of Ants Naturally


For a quick and easy way to naturally get rid of ants, mix together 1/4 cup jelly with 1/4 cup borax.  Leave in an open container near the infestation site.


Wednesday, July 24, 2013

Ten Tools Everyone Should Own


Benjamin Franklin once said, "By failing to prepare you are preparing to fail."  Having a basic toolkit is a way that you can be prepared for not only planned projects in your home, but also unexpected disasters that may arise.  With so many specialized tools on the market it can be hard to know where to start.  Here are our recommendations for tools that should be in everyone's toolbox.


1. Hammer

 A 16-20 oz hammer should do the trick for most jobs


2. Reversible Cordless Drill

Get one that is comfortable to hold and preferably that comes with a bit set


3. Level
 Choose a level that has a horizontal, a vertical, and a diagonal vial


4. Vise Grip Pliers 


 These are a step up from standard channel lock pliers

5. 6-Way Screwdriver

Pretty standard
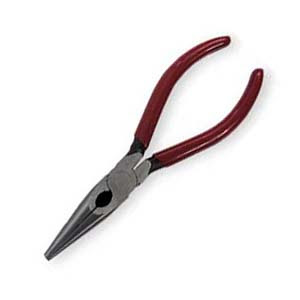
6. Needle Nose Pliers


Look for a pair that has a wire cutter near the axis.


7. Tape Measure

Get one that locks into place

8. Electrical Tester

This is especially important when changing out light fixtures.


9. Utility Knife
  There's really no substitute for a good utility knife.


10. Staple Gun

Necessary for most crafting, home decorating, or reupholstering projects.


Image Credits: 1/2/3/4/5/6/7/8/9/10


Thursday, July 18, 2013

Thursday Tips- New Use for Command Hooks

Image via

Use command hooks to place lids on a cabinet door and free up valuable storage space.

Thursday, July 11, 2013

Thursday Tips- Keep Track of Your Chargers

source
Use a binder clip to keep your phone charger from getting lost in the mass of wires under your desk

Wednesday, July 10, 2013

Weekend Project- Canning

Image via

With many fruits and vegetable at their peak ripeness, Summer is the perfect time to start canning.  If you're new to canning the process may seem intimidating.  But with a bit of attention to detail and the right supplies you can be stocking your pantry in no time.

Image via


Canning is best with fruits and vegetables that are at their optimum ripeness.  Try shopping at a local farmer's market or even picking fruit from your own backyard.  Many recipes will require that you peel the skin off before canning.

The basic supplies remain the same regardless of what you are canning.  All of these supplies can be found in our store or online to be delivered to our store at truevalue.com.


Once you have prepared your recipe, simply follow the instructions on your pressure cooker to properly heat and pressurize the cans so that no bacteria can enter.  No bacteria means no spoilage, so after your cans have cooled and you have heard the "ping" that signals the lids have been properly pressurized, cans can be stored on shelves without refrigeration.  Canned fruits and preserves make great gifts!

Have you ever tried canning? What was your experience with it?

**Special Offer: Now through August 30th, 2013 receive 10% off in-store canning supplies with a printout of this page**